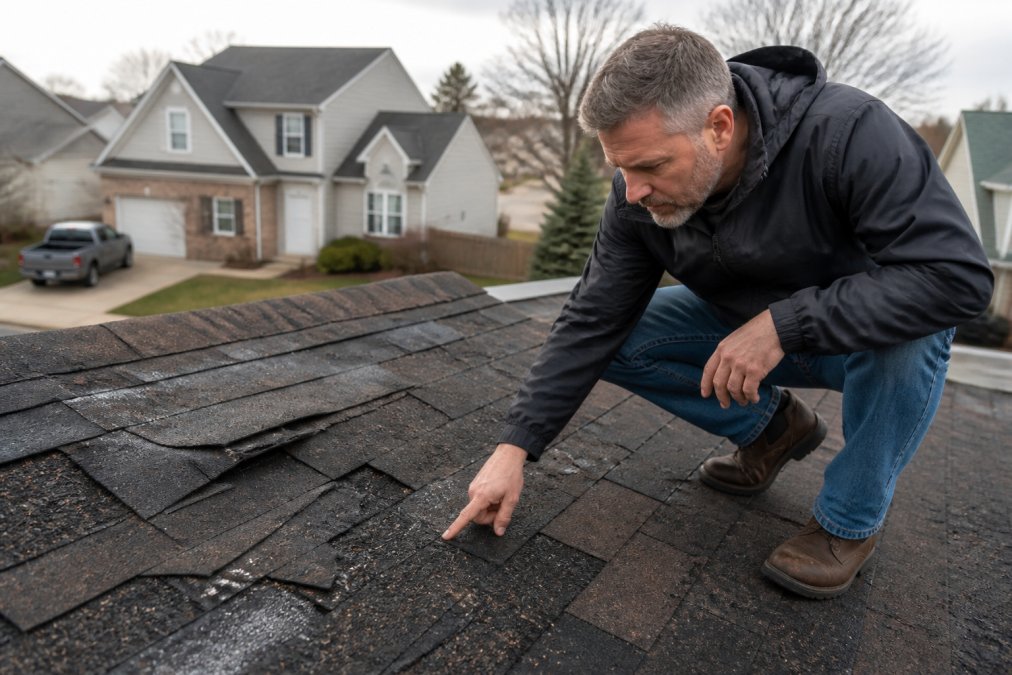
 how-to
How to Spot Storm Damage on Roof: 7-Step Guide
Table of Contents
- What You'll Need Before You Inspect
- Step 1: Do a Ground-Level Visual Inspection First
- Step 2: Identify Signs of Wind Damage on Shingles
- Step 3: Check for Hail Impact and Granule Loss
- Step 4: Inspect Flashing, Vents, and Gutters for Water Intrusion
- Step 5: Check the Attic for Hidden Storm Damage on Roof Decking
- How to Document Roof Damage for Insurance Claims
- Fire Resistant Roofing Materials and Ratings: A Smart Upgrade After Storm Damage
- Frequently Asked Questions
Last Updated: September 17, 2026
What You'll Need Before You Inspect
Knowing how to spot storm damage on roof surfaces starts with the right preparation, because the difference between a confident assessment and a wasted afternoon usually comes down to gear and timing. This guide from Wolff Exteriors walks through a safe, methodical inspection you can complete from the ground and the attic, without ever stepping onto a wet slope.
Gather these before you begin:
- Binoculars with at least 8x magnification
- A phone camera with zoom, for documentation
- Sturdy shoes with grip, plus work gloves
- A notepad or the notes app on your phone
- A flashlight for attic work
- A ladder you can secure on level ground
Step 1: Do a Ground-Level Visual Inspection First
The safest first pass is a slow walk around the perimeter of your home with binoculars. This ground-level visual inspection catches roughly the kind of damage most homeowners can identify without ever leaving the yard.
Start at one corner and work clockwise. Look for:
- Shingles sitting out of line or lifted at the edges
- Dark patches that suggest missing material
- Debris, branches, or granules piled at the base of downspouts
- Dented gutters or fascia
- Anything visibly displaced near ridge vents or chimneys
Step 2: Identify Signs of Wind Damage on Shingles
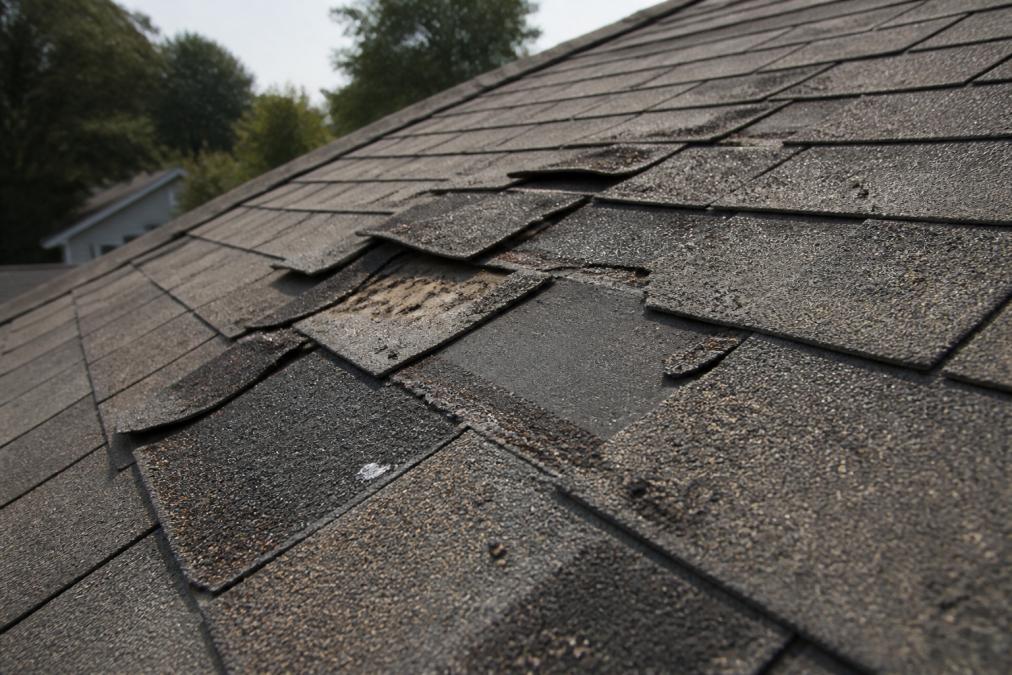
- Curling shingles, where corners lift and stay up
- Cracked shingles that split along the grain
- Missing tabs, especially on the windward side
- Exposed nails where a shingle has shifted
- Lifted flashing near edges and valleys
Step 3: Check for Hail Impact and Granule Loss
Look for:
- Random dents across shingles, not clustered in one area
- Dark spots where the mat underneath is exposed
- Granules collecting in gutters and at downspout outlets
- Dented metal on vents, flashing, and gutter aprons
- Cracked or blistered shingle surfaces
- Soft spots that give slightly under light finger pressure, like a bruise
How hail damage shows up on different roof materials
Hail does not leave the same fingerprint on every roof. Knowing what your material does under impact keeps you from either missing damage or chasing cosmetic marks.
- Asphalt shingles: bruised spots, granule loss, and fractures in the mat. The damage is often invisible from the ground and only shows up in raking light.
- Metal roofing: dents and dimples, especially on softer panels. Cosmetic dents may not compromise the panel, but they can affect the finish warranty, so document them.
- Clay and concrete tile: cracked or chipped tiles, and hairline fractures that let water past the tile into the underlayment. A cracked tile is a leak waiting to happen.
- Slate: chipped corners, cracked slates, and dislodged pieces. Slate is brittle under impact, and a single cracked slate can expose the deck.
- Wood shakes: split or splintered shakes, and bruised areas where the wood fibers have been crushed.
Telling hail damage from ordinary wear
A common pattern is that hail damage is random and directional, it follows the path of the storm and shows up on the slopes and elevations the hail hit. Ordinary wear, by contrast, tends to appear evenly across the roof or concentrate in high-traffic or sun-exposed areas. If the damage clusters on one side of the house and spares the other, that is a strong hail signal.
Step 4: Inspect Flashing, Vents, and Gutters for Water Intrusion
Flashing and gutter blockage are the two most common entry points for water intrusion after a storm. Flashing is the metal that seals roof joints, and any bend or gap in it lets water travel straight into the roof deck.
Check these areas closely:
- Chimney and skylight flashing for lifted or bent edges
- Vent boots and ridge vents for cracks or displaced seals
- Gutter seams for separation and sagging
- Downspouts for dents and clogs
- Drip edges for corrosion or gaps
Step 5: Check the Attic for Hidden Storm Damage on Roof Decking
Daylight through the roof boards is the clearest sign of a breach, and the attic is where hidden damage shows itself first. Bring your flashlight and look up.
Inspect for:
- Pinholes of daylight between deck boards
- Moisture stains or dark streaks on the roof deck
- Damp insulation or a musty smell
- Sagging or soft spots in the sheathing
- Water marks on rafters or trusses
How to Document Roof Damage for Insurance Claims
Knowing how to document roof damage for insurance is the step most homeowners rush, and it is the one that decides your claim. A clean, dated record does more for your payout than any argument you make on the phone. Most guides stop at "take photos and call your insurer." This is the actual workflow.
Step 1: Secure the scene before you document
If water is actively entering the home, stop the water first. Move valuables, place buckets, and photograph the interior damage as it happens. Your insurer expects you to mitigate further loss, and receipts for emergency tarping or temporary repairs are reimbursable under most policies. Keep every receipt.
Step 2: Photograph in a deliberate sequence
Adjusters respond to context. Shoot in this order so each image tells the story:
- Wide establishing shots of each roof plane from the ground, showing the whole house and the damaged slope in relation to the rest of the structure.
- Mid-range shots of each damaged area, close enough to see the pattern but far enough to show where on the roof it sits.
- Close-up shots of individual damage, a bruised shingle, a dented vent, a cracked tile, with a coin, ruler, or your hand in frame for scale.
- Interior shots of any ceiling stains, attic daylight, or damp insulation, with the same wide-to-close sequence.
- Gutter and downspout shots showing granule accumulation or debris, which corroborates roof-level damage.
Step 3: Build a written record
Photos without notes are half a claim. Keep a simple log with:
- The date and time of the storm
- The date and time you inspected
- What you observed at each location
- The date you first noticed each issue
- Names of anyone you spoke with at your insurer, and the date
Step 4: Get a professional inspection on record
A licensed roofing contractor's inspection report carries weight an adjuster cannot easily dismiss. Ask the contractor to photograph the damage before any work begins, note the material and age of the roof, and provide a written scope. Contractors see angles homeowners miss, and their documentation strengthens your claims process.
Step 5: File promptly and keep the originals
Most policies require prompt notice of a claim. File as soon as you have your documentation assembled, and keep the originals of everything, do not delete photos that seem unhelpful, and do not hand over your only copy of anything. Gaps in the record invite disputes.
| Documentation Item | Why It Matters | When to Capture |
|---|---|---|
| Dated wide shots | Establishes location and extent | Within 48 hours |
| Close-ups with scale | Proves severity and mechanism | Same day |
| Interior moisture photos | Ties exterior breach to interior loss | Same day |
| Storm date notes | Ties damage to a covered event | Immediately |
| Contractor inspection report | Independent verification | Before repairs |
| Tarping receipts | Supports mitigation costs | After any emergency work |
| Written timeline | Establishes a clean record | Ongoing |
Fire Resistant Roofing Materials and Ratings: A Smart Upgrade After Storm Damage
If a storm has already compromised your roof, it is worth considering fire resistant roofing materials and ratings while you plan the repair. Class A, B, and C ratings describe how well a roof resists external fire exposure, and Class A offers the highest level of protection.
Common Class A options include:
- Asphalt shingles with a fire-rated fiberglass mat
- Metal roofing with a noncombustible substrate
- Clay and concrete tile
- Slate
Frequently Asked Questions
What does wind damage look like on a shingle roof?
Wind damage on asphalt shingles typically shows as curling edges, cracked shingles, missing tabs, and exposed nail heads. You may also see granule loss where the protective surface has worn away, or shingles that have lifted and not sealed back down. Check ridges, hips, and roof edges first since those areas take the brunt of wind uplift. If you see shingles scattered in your yard or dents in gutters, the roof surface likely has matching damage.
Will insurance cover storm damage to my roof?
Most homeowner policies cover sudden storm damage from hail, wind, or falling debris, but not damage from age or neglect. The key is documentation. Take dated photos of all damage, keep receipts for emergency tarping, and file your claim promptly. An insurance adjuster will inspect and compare your evidence against policy terms. If your roof is near the end of its lifespan, the payout may be reduced to actual cash value rather than replacement cost.
How do I safely inspect my roof after a severe storm?
Start from the ground with binoculars to check for missing shingles, dents, and debris. Never walk on a wet, steep, or damaged roof. Use a ladder only on stable, level ground and stay below the roofline. If you see sagging, soft spots, or significant granule loss, stop and call a roofing contractor. Attic inspections are safer: look for daylight through the roof deck, moisture stains, and damp insulation.
When should I call a professional for a roof inspection?
Call a professional if you see missing shingles, sagging areas, water stains on ceilings, or daylight in the attic. Also call if your roof is older than 15 years, if the pitch is steep, or if you are unsure about what you are seeing. A licensed roofing contractor can document damage for insurance, perform temporary emergency tarping, and assess whether repairs or full replacement is needed. Early action prevents small issues from becoming costly structural problems.
Storm damage rarely announces itself with a hole in your ceiling; it shows up as granules in the gutter, a lifted shingle, or a faint stain on the attic deck. Catching those early signs is what separates a quick repair from a full replacement. Wolff Exteriors offers fast, reliable roof repair and maintenance, durable high-quality materials, and constant communication until the job is done. Request a free quote from Wolff Exteriors and get a clear assessment of what your roof actually needs.